EPXDisplay扩展,需要配合微软出品的像素画编辑软件Expressive Pixels使用。
扩展地址:https://github.com/microsoft/expressivepixelsmakecode
具体操作如下:
1.首先通过Expressive Pixels软件制作动画效果,也可以使用内置的动画效果,并获取相应的代码。
2.将ipixel像素屏连接至P8引脚,也可以连接至P1/P2,或者其它引脚。
3.添加扩展。
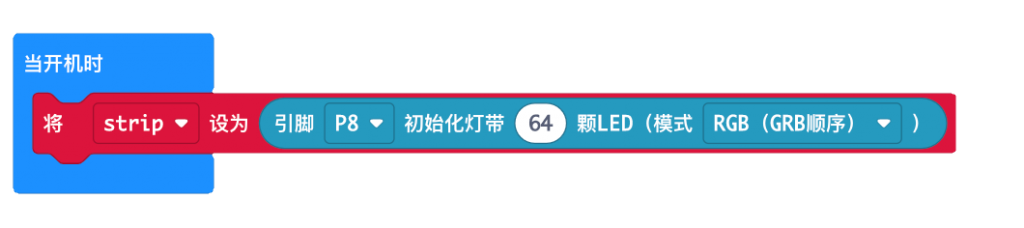
4.初始化8×8像素屏。
5.从Expressive Pixels获取动画的代码。
例如:
let myAnimation = hex`010001050f0043000000000000ff0000ff1a00ffd557ff0c00490040000001000001000000010002020001000000010101010000000303040403030000040404040404000004040404040400000303020203030000030302020303000000`;6.在makecode中,切换到javascript模式。
将代码粘贴到初始化代码前。例如:
input.onButtonPressed(Button.A, function () {

})
let myAnimation = hex`010001050f0043000000000000ff0000ff1a00ffd557ff0c00490040000001000001000000010002020001000000010101010000000303040403030000040404040404000004040404040400000303020203030000030302020303000000`;
// 初始化像素屏
let strip = neopixel.create(DigitalPin.P8, 64, NeoPixelMode.RGB)
basic.forever(function () {

})
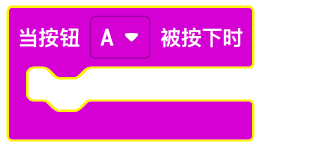
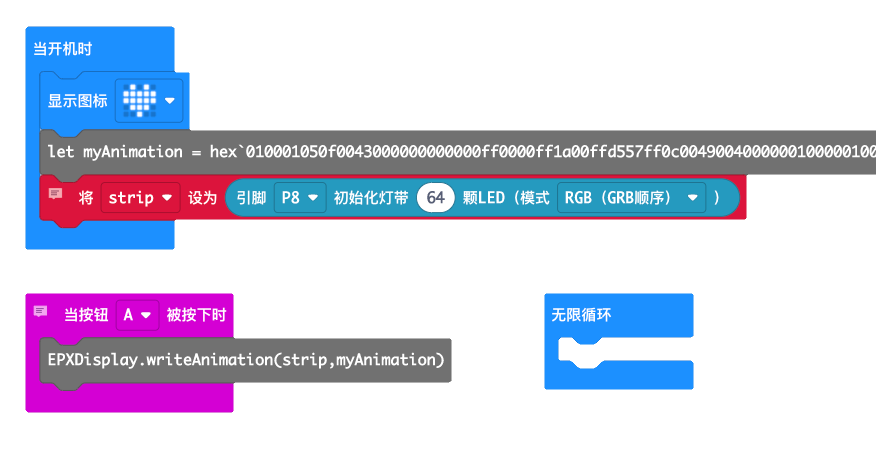
7.显示效果。以按下A按钮显示为例,切换到“方块”模式,增加
8.切换到代码模式,完成显示代码。
input.onButtonPressed(Button.A, function () {
    EPXDisplay.writeAnimation(strip,myAnimation)
//显示动画
})
let myAnimation = hex`010001050f0043000000000000ff0000ff1a00ffd557ff0c00490040000001000001000000010002020001000000010101010000000303040403030000040404040404000004040404040400000303020203030000030302020303000000`;
// 初始化像素屏
let strip = neopixel.create(DigitalPin.P8, 64, NeoPixelMode.RGB)
basic.forever(function () {

})
9.切换到“方块”模式。查看代码效果。
如图:
有任何问题,可以留言。